Tea for Teddy: Stitching a Felt Biscuit Selection from Scraps
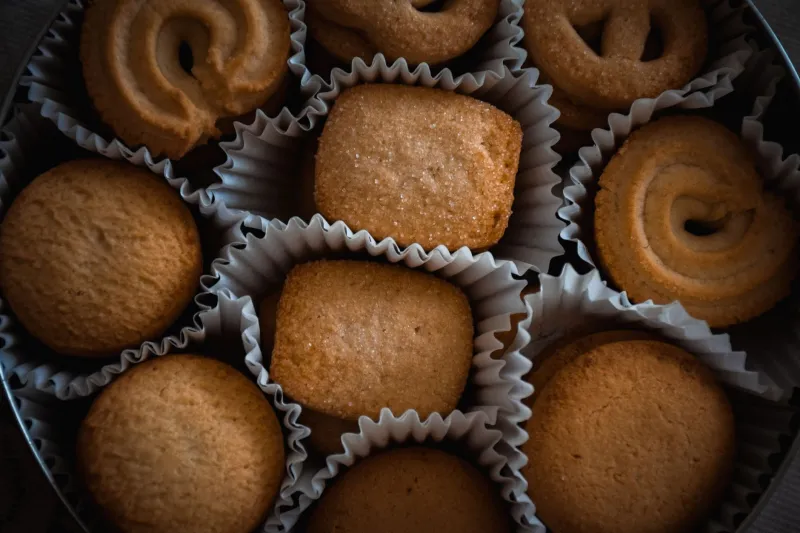
Every toy kitchen needs a biscuit tin. Not a plastic one with a picture of a biscuit on the lid, but a proper tin — the kind that rattles when a teddy bear tea party is being set up. This beginner hand-sewing project turns wool felt scraps into a playtime selection of UK favourites: custard creams, bourbons and jammy dodgers. The stitches are simple, the shapes are forgiving, and the finished set can live in a recycled biscuit tin between outings. It is a lovely one-afternoon make for adults and older children to tackle together, and a gentle way to use up those oddments from the scrap bag.
Start with a biscuit-sized plan
You do not need much to get going, and most of it is probably already in your sewing box. Wool felt is the nicest choice because it does not fray, holds its shape and feels lovely in small hands. Acrylic felt works too, but wool or a wool-blend felt gives the biscuits a softer, more biscuit-like finish.
Here is the short version of the kit list:
- Wool felt scraps in cream, brown, pink or red
- Matching embroidery thread
- A tapestry needle or blunt embroidery needle for little makers, plus a sharper embroidery needle for adults
- Small sharp scissors for grown-ups and safety scissors for children
- Thin card for templates and a pencil
- A little polyester toy filling or felt offcuts for padding
- A clean recycled biscuit tin
- Optional: pinking shears, a fabric marker and a glue stick
A quick word on thread: embroidery thread is easier to see and to thread than regular sewing cotton, especially for beginners. Cut a length about as long as your forearm — any longer and it will tangle, knot and generally behave like a naughty piece of spaghetti.
Templates that do not need a maths degree
Keep the shapes simple. A custard cream can be a rounded rectangle about 4cm by 6cm. A bourbon can be a slightly longer rectangle, around 4cm by 7cm. A jammy dodger is a circle about 6cm across, with a smaller heart or circle cut from the top layer to show the jam.
Draw the shapes on thin card and cut them out. Card templates are sturdier than paper and can be used again and again. If you want neat edges, hold the template on the felt with a couple of small clips rather than pins — clips are kinder to small fingers and less likely to disappear into the carpet.
For each biscuit you will need two felt shapes, plus a third layer if you are making a sandwich biscuit. Slightly wonky cutting is part of the charm. A playtime biscuit does not need to pass a factory inspection.
Three stitches to know
You only need three easy stitches for the whole tin.
Running stitch is the workhorse. Bring the needle up through both layers, then down again a short distance away. Keep the stitches small and evenly spaced if you can, but do not worry if they wander. Running stitch is perfect for joining edges and adding decorative lines.
Whip stitch is the quick closer. Bring the needle up through both layers near the edge, then wrap the thread over the edge and back up again. It makes a neat, slightly ridged border and is brilliant for closing the gap after stuffing.
Straight stitch is just a single line in and out. Use it for biscuit details: the little lines on a bourbon, the border on a custard cream, or the icing pattern on a jammy dodger. It is also the easiest stitch to teach first because it is basically drawing with thread.
Stitching a custard cream
Place two cream felt rectangles together. Starting at one corner, sew a running stitch around the edge, about 5mm in from the raw edge. Leave a gap of about 3cm on one side so you can add a small pinch of filling. Do not overstuff — a flat biscuit with a little padding sits nicely in a tin and does not bulge at the seams.
Close the gap with whip stitch. Then add a line of running stitch around the border to suggest the crimped edge of a custard cream. If you want to add a little custard-coloured centre, sew a small straight stitch line across the middle in a paler thread. It is not realistic enough to fool a biscuit connoisseur, but it is very convincing to a teddy bear.
Bourbons and jammy dodgers
For a bourbon, cut two brown felt rectangles and one slightly smaller cream felt rectangle for the filling. Stack them brown, cream, brown, then sew around the edge with running stitch, leaving a gap for a tiny bit of padding. Close with whip stitch. Add three or four straight stitches across the top for the classic bourbon lines. A few dark brown stitches along the edge give a nice chocolatey finish.
For a jammy dodger, cut two cream circles. From one circle, cut a heart shape out of the centre. Place a small red or pink felt circle behind the heart opening so the jam peeks through. Sew the two cream layers together around the outer edge with running stitch, then whip stitch around the heart opening for a tidy finish. You can add a tiny bit of filling between the layers if you like, but keep it very thin so the heart stays open.
Safe sewing for small hands
Little makers can absolutely help with this project, but a few sensible swaps make it easier. Use tapestry needles with a blunt tip and a large eye — they push through wool felt without pricking fingers quite so readily. Plastic safety needles are even better for very young children. Keep the sharp embroidery needles for grown-ups.
Use clips instead of pins where possible, and keep pins in a magnetic dish well out of reach. Teach the rhyme needle down, eyes up before anyone starts sewing, and remind everyone to keep their needle pointing towards the table when they are not using it. Small, sharp scissors should stay with the adult; children can use safety scissors for cutting felt shapes. If a child is threading a needle, a needle threader is a small miracle worth keeping in the tin.
The tin itself
Once the biscuits are stitched, find a clean biscuit tin — the sort that once held custard creams or shortbread. Wipe it out, line the base with a scrap of baking parchment or pretty fabric, and add a small felt divider if you want to keep the biscuits from sliding about. A piece of washi tape on the lid with the word biscuits written on it is a nice finishing touch.
The tin is also part of the play. Children can stack the biscuits, count them, sort them by colour, or set up a tiny toy kitchen cafe. A few felt biscuits and a recycled tin make a brilliant present for a teddy bear tea party, and they pack away in seconds.
Playtime, sorted
This is one of those projects that looks sweet but is really about the doing: choosing scraps, cutting wobbly shapes, learning a running stitch and watching a flat piece of felt become something a child wants to play with. The biscuits do not need to be perfect. In fact, the slightly lopsided jammy dodger is usually the one that gets chosen first.
Set out a tin, a few felt scraps and a quiet afternoon. Teddy will bring the tea.